Showing posts with label Baking. Show all posts

January 6, 2014

Homemade Vanilla Bean Marshmallows!

Baby, it's cold outside!  I hope you've all been staying warm on this bitterly cold day - and staying safe!  What better time of year to enjoy some hot cocoa with marshmallows - especially if they're homemade vanilla bean marshmallows! Now doesn't that sound nice?

Homemade hot chocolate + vanilla bean marshmallows on Christmas Day

I took my first attempt at marshmallow making a few days before Christmas.  After whipping up my standard holiday goodies I wanted to add something fun & surprising to the mix.  For some reason, marshmallows had been on my mind. I remember one of the only times I really enjoyed a marshmallow was at Hot Chocolate - an incredible restaurant in Chicago.  It was there that I first tasted house-made Mexican hot chocolate with house-made marshmallows.  The combination was unforgettable.  Beyond that - unless it's sandwiched between two graham crackers with a chunk of chocolate & toasted - you probably won't find me consuming these sweet little treats.

I am aware that marshmallows, for the most part, are universally adored.  Little did I know just how huge of a hit these little vanilla-spiked squares would be - particularly with members of my family.  We enjoyed them on Christmas at my brother's house and again at my parents' house in Iowa for our extended family Christmas. This recipe makes about 24 marshmallows (depending on how you cut them) and there wasn't a scrap to be found after our two family get-togethers.  I'd call that a success.

I found a recipe for vanilla bean marshmallows from MarthaStewart.com and followed it almost exactly - it starts out a bit odd (especially if you've never made marshmallows before) but I included some photos to give an idea that you're on the right track.

Recipe below - stay warm out there!

Vanilla Bean Marshmallows - finished product

Sugar, corn syrup + water boiling

Water + gelatin before adding boiling mixture


Scraped Madagascar vanilla bean


Marshmallow mixture setting


Sifted powdered sugar


Lovely little treats


Homemade Vanilla Bean Marshmallows

  • *makes about 24 1.5" x 2" marshmallows*

    Ingredients

    • - Nonstick cooking spray
    • - 3 (1/4-ounce) packages unflavored gelatin (4 come in a single box)
    • - 1/2 cup cold water
    • - 2 cups granulated sugar
    • - 2/3 cup light corn syrup
    • - 1/4 teaspoon coarse sea salt
    • - 1 vanilla bean, scraped
    • - 1 1/2 teaspoon pure vanilla extract
    • - powdered sugar, sifted - for coating

    • Directions

    • Lightly spray a 9-by-9-inch baking pan with cooking spray. Line pan with plastic wrap, leaving a 2-inch overhang on all sides (like a sling); set aside.

    • In the bowl of an electric mixer fitted with the whisk attachment, sprinkle gelatin over 1/2 cup cold water; let stand for 10 minutes. Meanwhile, in a medium saucepan combine sugar, corn syrup & 1/4 cup water. Place saucepan over medium-high heat and bring to a boil; boil rapidly for 1 minute. Remove from heat; turn the mixer on high and slowly pour the boiling syrup down the side of the mixer bowl into the gelatin mixture. Add salt and continue mixing for 11 minutes.

    • Add vanilla extract & vanilla bean seeds, and mix until well combined. Spray a rubber spatula or your hands with cooking spray. Spread marshmallow mixture evenly into prepared pan.  Wrap sprayed sides of plastic wrap over top of marshmallow mixture in pan.  Spray a sheet of plastic wrap with cooking spray and place, spray side down, on top of marshmallows if not all the way covered already. Let stand for at least 2 hours (no more than 6).

    • Remove wrapped marshmallows from pan and place on a cutting board.  Unwrap marshmallows on cutting board.  Using a sharp knife that has been heated under hot water & wiped clean, begin to cut marshmallows into 2-inch squares.  Rinse knife under hot water and wipe clean after every other cut.

    • Once marshmallows are all cut, add powdered sugar to a medium bowl and toss marshmallows to coat, working in batches. Marshmallows will keep in an airtight container for up to 6 days.


October 22, 2013

Harvest Dinner Party & a Happy Heart

There is almost nothing I enjoy more than playing host to family & friends in my home. Right now, home is my beautiful, quirky one-bedroom apartment in Lincoln Park.  No matter the season, this place brims with a charm that makes my heart happy day in & day out.  Today, much of the Midwest will see snow for the first time in months, but I don't mind a bit because that means I get to fire up my wood-burning fireplace & cozy up under a big cable-knit blanket to write or watch a movie.  Talk about my happy place.  Having this quaint spot mostly to myself for the past two years has no doubt spoiled me, but I love to share the good vibes of my little bungalow by having people over for dinner, drinks or weekend visits in hopes that they leave with their hearts feeling a bit happier too.

photos of my grandparents & great grandfather in my bedroom

On Saturday night I had the pleasure of hosting seven girlfriends for a fall/harvest dinner party at my place, and it was a smashing success.  I must say, I have some pretty awesome ladies in my life who are not only genuine, fun, smart and funny as hell, but each one of them knows how to prepare a mean fall dish, as evidenced by our menu that night.

Planning a dinner party is one of my absolute favorite things to do for some very specific reasons; I obviously adore the hosting aspect, but it's the idea of bringing people together to break bread, connect face-to-face & forge or strengthen a sense of community that I love the most.  We're all busy, we all have conflicting schedules, but if we can somehow carve out the time to commit to sitting down with one another to reconnect and share a meal, it doesn't just fill our stomachs - it feeds our souls. 


Table set & ready

Getting their spiked cider on

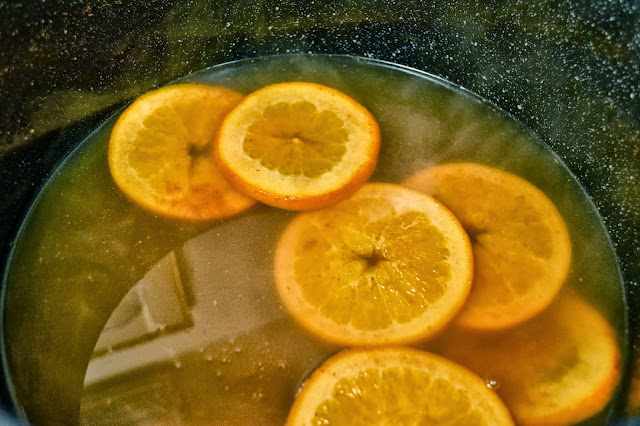
This cider made my entire apartment smell heavenly

Goodness simmering in my kitchen

Goat cheese, fig & caramelized onion crostinis!

Homemade hummus dip & fresh veggies

Look at those smiles - I heart my friends

Table of plenty

Halloween cookies, decorated by Cindy!

After dinner we broke out dessert (Halloween cookies, pumpkin bars & pumpkin macaroons!) and a few more bottles of wine.  Eventually the Maker's Mark made an appearance alongside the bottle of Owl's Brew that was sent to me as a gift - I must say the two went together quite well.  The post-dinner music switched from Band of Horses, Beta Radio and Shovels & Rope to YouTube video requests for songs from our high school days and hilarious SNL clips.

We also spent the next few hours playing a game that you download on your cell phone called Heads Up. It's sort of like Pictionary & Catch Phrase combined.  Look it up & download it for your next party or family get together - trust me, you won't be disappointed!  Our favorite categories had us acting out clues or humming them - I haven't laughed that hard in a really long time.  At one point I stepped away from the game to snap some photos of this perfect evening - happily buzzed on spiked cider & wine, full of delicious food and completely content, loving each other's company - none of us wanted to be anywhere else.  It was immediately decided that this was going to be a tradition, the next one to be held in December.  
Heart = Happy - oh so Happy.

Games begin

Laughter ensues

These girls are awesome

Maker's + Owl's Brew

The last ones to leave the party - I laugh til I cry with these two

The next morning - dinner party success!

This guy looked lonely - luckily he joined the others in my tummy a short while later :)


We did good

There were so many amazing dishes prepared that night: spiced rum-spiked apple cider with cinnamon sticks; homemade hummus dip & veggies; fig, goat cheese & caramelized onion crostinis; pumpkin & goat cheese empanadas; creamy butternut squash soup; a pear, goat cheese & candied walnut mixed greens salad with maple balsamic dressing; Maker's Mark & cider glazed turkey and pork meatballs with rosemary & sage; Gorgonzola, pear & walnut flat bread pizzas; and homemade pumpkin bars, Halloween cookies & pumpkin macaroons for dessert.  We ate extremely well thanks to every one's hard work & creativity.

I leave you now with my recipe for the meatballs I made - these were the perfect touch to compliment the butternut squash soup, meatless pizzas & other dishes.  And they couldn't have been much easier either!  I hope you enjoy :)

Maker's Mark & Apple Cider Glazed Turkey + Pork Meatballs
*adapted from this recipe


Ingredients:
Meatballs:
- 1 lb lean ground turkey, thawed
- 1/2 - 1 lb ground pork sausage, thawed
- 1 tbsp fresh sage, chopped
- 1 tbsp fresh rosemary, chopped
- 1/2 tsp garlic powder
- 1 tbsp dried onion flakes
- 1/4 tsp coarsely ground sea salt
- 1/2 tsp coarsely ground pepper
- 1 egg, whisked

Glaze:
- 1/2 c Maker's Mark Bourbon (or similar bourbon of your choice)
- 1 1/2 c apple cider
- 1/4 c brown sugar
- sprig of fresh rosemary to simmer in pot

Directions:
Preheat oven to 375 degrees F.  Cover a large cookie sheet with a layer of foil and spray with cooking spray - set aside.

In a large bowl combine all ingredients for the meatballs.  Roll into 1.5 inch balls and place on the cookie sheet in rows - they can be close together.  (You will have between 20-30 meatballs depending on the size you roll them).  Place in oven and bake for 15 minutes.

Add all glaze ingredients to a small bowl and whisk together until combined.  Add to a small saucepan and cook on medium-high for about 10 mins, or until glaze starts to appear thicker and shiny.  Add the cooked meatballs to the glaze & stir to coat evenly.  Simmer on low heat until ready to serve (careful not to simmer for too long so glaze evaporates.  I recommend not simmering for longer than 45 mins on very low heat).

Serve with a big spoon for plating or with toothpicks - enjoy!

※ ※ ※


August 20, 2013

Tres Leches Cake with Whipped Cream Frosting + Summer Berries

For my friend Meg's 30th birthday bash we enjoyed quite the day of festivities - brunch, hilarious storytelling over mimosas, a day at the beach with the girls, special cards, phone calls & letters for Meg, dinner at a charming little Mexican joint, followed by cocktails & dancing at some of our favorite spots in Chicago. Megan's friends & family all helped plan the day - whether they were there in person or sending their love from miles away.

close up of this little beauty

I personally love it when birthdays of my friends roll around because it gives me an excuse to bake a big ol' cake - something I usually don't do since I live sans roommates & don't have much of sweet tooth (unless we're talking cheesecake - I will eat an entire one of those myself, no problem...as long as it's with fruit and not chocolate or caramel ☺).  Knowing we were going to a Mexican restaurant for the birthday dinner, I wanted to make a cake for Meg that would be a nice compliment to the cuisine - something light since I also knew we'd be going out for post-dinner drinks.  This led me to try my hand at my very first Tres Leches cake - now officially one of the easiest & tastiest cakes I have ever made.

I adapted this recipe from one I found on Martha Stewart's website. I also picked up some gorgeously ripe summer berries from Whole Foods to top the homemade whipped cream frosting.  So good, so easy, such a hit!  Everyone loved the cake & it was the perfect end to a great dinner at Las Palmas.  Recipe & photos below...


Happy Birthday, Meg - cheers to the best year yet! xoxo

※ ※ ※


a little slice of heaven right there

Tres Leches Cake with Whipped Cream Frosting + Summer Berries


Ingredients
- 1 stick butter, melted & then cooled to room temp
- 1 1/2 c flour
- 1 tsp baking powder
- 1/2 tsp sea salt (regular salt is fine too)
- 3/4 c sugar
- 5 eggs
- 1 1/2 tsp vanilla extract
- 1 14-oz can sweetened condensed milk
- 1 12-oz can evaporated milk

For Whipped Frosting
- 2 c heavy whipping cream
- 1/2 c sugar

For Fruit Topping
- 1 package fresh strawberries, rinsed & sliced
- 1 package fresh blackberries, rinsed
*OR substitute any kind of fruit your little heart desires

Directions
Preheat over to 350° and grease a square 11 x 11" inch metal baking pan, or a 9 x 13" baking dish.

In a medium bowl whisk together the flour, baking powder and sea salt - set aside.  In the bowl of an electric mixer, beat 3/4 c sugar and eggs together on high speed until pale & thick (about 4 mins).  Add the vanilla and mix to incorporate.  With the mixer turned to low speed, add the flour mixture in 3 parts, stopping the mixer to scrape the sides of the bowl after each addition.  Stop mixer - using a spatula, fold in the melted butter until incorporated.  Transfer the batter to your baking dish.  Bake for 15 mins, then turn dish in oven and bake for another 15-20 mins or until golden brown and a toothpick inserted into center comes out clean.  Once out of the oven & while cake is still warm, poke holes all over the top of the cake using a wooden skewer.

In a medium bowl whisk together the condensed & evaporated milks. Pour mixture all over the top of the cake & let cool to room temperature (about 1 hour).

For Frosting
In an electric mixer fitted with a whisk attachment, whip the heavy cream & 1/4 c sugar together on medium high speed until peaks form & the consistency is like whip cream (should be somewhat stiff so it's able to spread like frosting, but still light & fluffy).  Once cake has cooled, frost with whipped cream and decorate with the fresh fruit of your choice.  Refrigerate cake until ready to be served, or serve immediately.

※ ※ ※